Creating HMIs With Unserver - Part 1: Buttons
Introduction
This tutorial demonstrates how to create a Web HMI page with buttons connected to a PLC.
The full full code for this article is available on Github.
Prerequisites
To follow this tutorial, you will need to install Unserver and connect it to a PLC over Modbus RTU.
PLC Program API
Our PLC contains a control program for a production line.
It provides the following API to an HMI program:
- The production process can be started by setting a coil
C0toON. - To stop the production line, a coil
C1should be set toON. - The current status of the facility is reflected by
C10, whereONmeans it's running.
Unserver Configuration
In order to connect to the PLC, we will use the following Unserver configuration:
tags.json
[
{
    "name": "line-control", "device": "plc1",
    "properties": [
        { "name": "start", "address":"C0", "type": "bool", "raw": "bool" },
        { "name": "stop", "address":"C1", "type": "bool", "raw": "bool" }
    ]
},
{
    "name": "line-state", "device": "plc1",
    "polling": {"enabled":true, "frequency": 2},
    "properties": [
        { "name": "running" ,"address": "C10", "type": "bool", "raw": "bool" }
    ]
}
]
As you can see, we have created two tags: line-control and line-state.
line-control has two boolean properties: start and stop which are mapped to the corresponding coils of the PLC.
line-state is a tag that reflects the current status of the line. It has a property running mapped to C10 and the tag itself is polled with 500ms intervals.
Web Page Development
The web page we have created uses several front-end libraries to simplify web app development.
- vuejs is used for javascript code
- purecss is used for styling
Don't worry, they are all really simple and you can still use any other libraries to structure you app.
Please note that the code samples in this article are not complete. You can find the full code on github.
Making Calls to Unserver API
Unserver API is really simple, but we have included the unserver.js library to make API calls even easier.
Here is how to write a property using unserver.js:
// first, create an instance of the API client
var unserver = new Unserver('http://127.0.0.1:9000');

// write a property - set 'startLine' to 'true'
unserver.setProperty('lineControl.startLine', true)
The library itself is freely availabe on Unserver Github.
Create HTML page
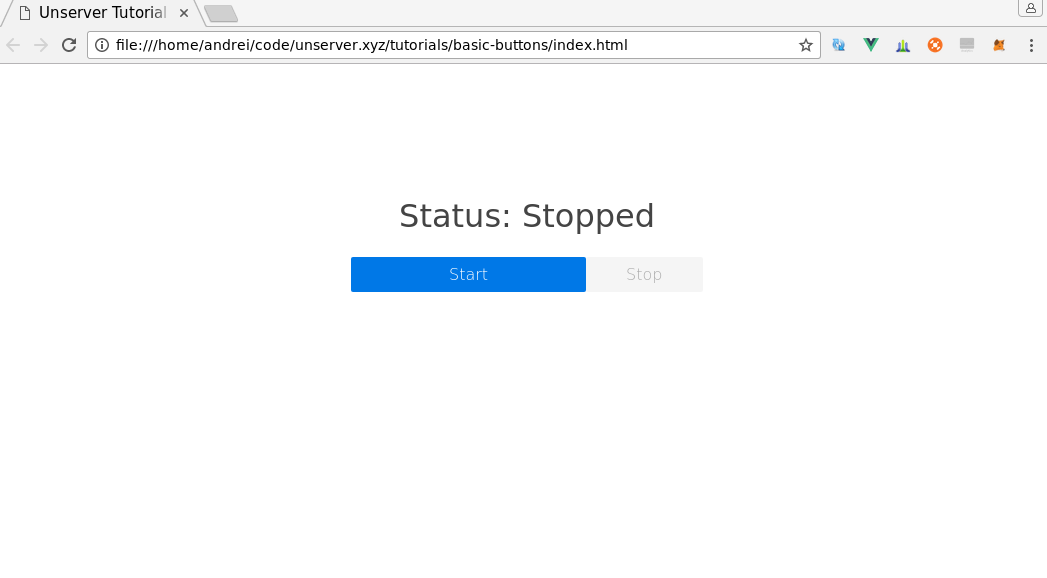
This code will show the current status based on isRunning property of our app:
<h1>Status: {{isRunning ? 'Started': 'Stopped'}}</h1>
The 'Start' button triggers the start method of the app and is disabled when isRunning is true:
<button
    v-bind:disabled="isRunning"
    v-on:click="start"
    class="pure-button pure-button-primary pure-u-1">Start</button>
The 'Stop' button triggers the stop method of the app and is disabled when isRunning is `false:
<button
    v-on:click="stop"
    v-bind:disabled="!isRunning"
    class="pure-button pure-u-1">Stop</button>
The code below combines all elements together:
<div id="root">
        <div class="title">
            <h1>Status: {{isRunning ? 'Started': 'Stopped'}}</h1>
        </div>
        <div class="pure-g">
            <div class="pure-u-2-3 button-container">
                <button
                    v-bind:disabled="isRunning"
                    v-on:click="start"
                    class="pure-button pure-button-primary pure-u-1">Start</button>
            </div>
            <div class="pure-u-1-3 button-container">
                <button
                    v-on:click="stop"
                    v-bind:disabled="!isRunning"
                    class="pure-button pure-u-1">Stop</button>
            </div>
        </div>
</div>
Javascript
To handle button press events we define start and stop methods in our Vue app.
Those methods will be automatically bound to buttons we have defined ealier in index.html.
from index.js:
methods:{
    start: function(){
        unserver.setProperty('line-control.start', true);
    },
    stop: function(){
        unserver.setProperty('line-control.stop', true);
    }
}
To update the status bar, we will subscribe to line-control.running property.
In the callback we update isRunning property of our Vue app, which is bound to the status bar.
from index.js:
unserver.watchProperty('line-state.running', function(value){
    self.isRunning = value;
});